
Manual Node.js Deployment to AWS EC2
I. Introduction
Deployment is moving an application from a local machine to a server where it can be accessed over the internet. This lab does that manually by taking a Node.js application and running it on an AWS EC2 instance using SSH, SCP, and npm. By the end, the application will be accessible from a browser using the server’s public IP address.
II. Clone the Repository
The starting point is getting the application code onto the local machine.
Step 1. Open a terminal and run the following command to clone the repository.
git clone https://github.com/Hepher-Ossounga/profolio-node-lab.git
cd profolio-node-lab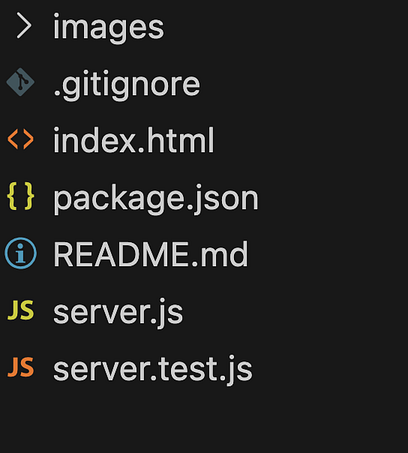
III. Package the Application
Step 2. Run npm pack.
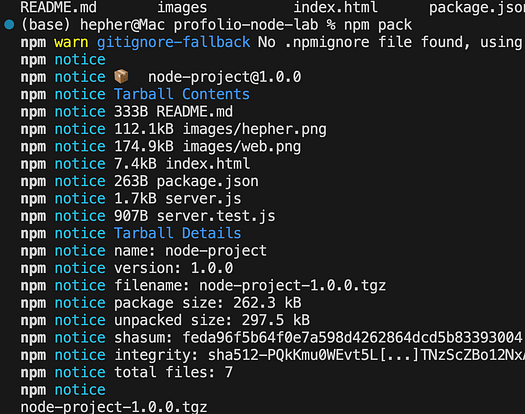
Before the application can be moved to a remote server, it needs to be packaged. npm pack handles this. It reads the project and compresses everything into a single .tgz file.
npm pack
This produces a file like node-project-1.0.0.tgz in the same directory. That file is what gets transferred to the EC2 instance.
IV. Launch an EC2 Instance
An EC2 instance is a virtual machine running in AWS. It behaves exactly like a physical Linux server but lives in the cloud. AWS manages the underlying hardware. The instance gets its own public IP address, which is how the application will be reached from a browser.
Step 3. Open the AWS Management Console and navigate to EC2.
Step 4. Click Launch instance.
Step 5. Set the instance name and choose Ubuntu as the AMI.
Step 6. Select t2.micro or t3.micro as the instance type.
Step 7. Create a key pair and download the .pem file. Store it somewhere accessible such as ~/Downloads/.
V. Configure the Security Group
A security group is a firewall that controls what traffic is allowed in and out of the EC2 instance. By default, all inbound traffic is blocked. Rules must be added explicitly for any port that needs to be reachable from the outside.
Step 8. Set the first rule type to HTTP, the protocol to TCP, the port to 80, and the source to 0.0.0.0/0.
Step 9. Add an SSH inbound rule. Set the type to SSH, the protocol to TCP, the port to 22.
Step 10. Add a second inbound rule for the application port. Set the type to Custom TCP, the protocol to TCP, the port to 3000, and the source to 0.0.0.0/0. The value 0.0.0.0/0 means any IP address can reach this port. Without this rule, the application cannot be reached from the browser even if it is running on the server.
Step 11. Click Launch instance.
VI. SSH into the EC2 Instance
SSH stands for Secure Shell. It is a protocol that opens an encrypted connection between two machines over a network.
Step 12. Wait for the instance to reach a running state and copy the public IP address from the EC2 console.
Step 13. Open a terminal on the local machine and set the correct permissions on the key file. SSH refuses to use a key file that other users on the local system can read because it treats that as a security risk.
chmod 400 ~/Downloads/my-key.pemStep 14. Connect to the instance.
ssh -i ~/Downloads/my-key.pem ubuntu@<EC2-PUBLIC-IP>
Replace <EC2-PUBLIC-IP> with the public IP address copied from the console. The -i flag tells SSH which private key file to use. ubuntu is the default username on Ubuntu AMIs.
VII. Install Node.js and npm on the Server
The EC2 instance is a fresh Ubuntu server. It does not have Node.js or npm installed. The application cannot run without a Node.js runtime, so it must be installed on the server before the app is transferred.
A runtime is the software that reads and executes the application code. Node.js is the runtime for JavaScript applications running outside the browser. Without it, the server has no way to understand or run the code.
Step 15. Update the package list and install Node.js and npm.
sudo apt update
sudo apt install -y nodejs npm
sudo runs the command with administrator privileges. apt stands for Advanced Package Tool. It is the package manager that comes with Ubuntu and belongs to the Debian family of Linux distributions. Any system based on Debian, such as Ubuntu, uses apt to manage software. A package manager handles downloading, installing, and updating software on the system. Instead of going to a website and downloading an installer manually, apt fetches the software directly from official repositories and installs it with a single command. The -y flag automatically confirms the installation without prompting.
Step 16. Verify the installation.
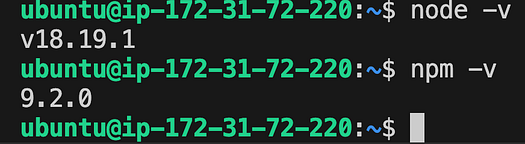
node -v
npm -v
Both commands should return version numbers. If they do, the server runtime is ready.
VIII. Copy the Application to EC2
SCP stands for Secure Copy Protocol. It transfers files between two machines over SSH. The same private key and connection details used for SSH are used here. The difference is that instead of opening an interactive shell session, SCP transfers a file and then closes the connection.
Step 17. Open a new terminal window on the local machine. Do not run this inside the EC2 SSH session.
Step 18. Copy the tarball to the EC2 instance.
scp -i ~/Downloads/my-key.pem node-project-1.0.0.tgz ubuntu@<EC2-PUBLIC-IP>:/home/ubuntu
The format of the command is the local file path followed by user@host:destination path.

IX. Run the Application on EC2
With the tarball on the server, the last step is to extract it, install dependencies, and start the application.
Step 19. Switch back to the terminal that is connected to the EC2 instance via SSH.
Step 20. Extract the tarball.
tar -zxvf node-project-1.0.0.tgz
tar is the command used to work with tarball archives on Linux. The flags -zxvf each do something specific. z tells tar the file is compressed with gzip. x tells it to extract the contents. v enables verbose mode so each file is printed as it is extracted. f tells tar the next argument is the filename to work with.
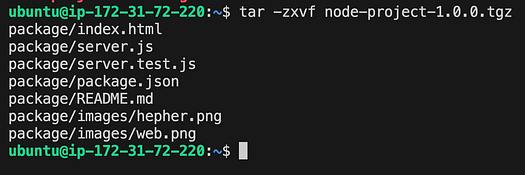
Step 21. Move into the extracted directory.
cd packageStep 22. Install dependencies. npm install reads the package.json file and downloads all the packages the application needs to run. These packages were not included in the tarball. They are fetched from the npm registry at install time.
npm installStep 23. Start the application.
node server.js
Step 24. Open a browser and navigate to the application.
http://<EC2-PUBLIC-IP>:3000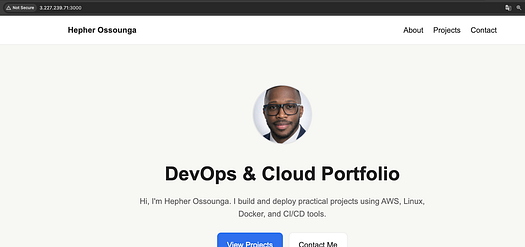
If the page loads, the lab is complete. The Node.js application is now running on a live AWS EC2 instance.
X. Troubleshooting
After the application was deployed and node server.js was run, the browser could not reach the application. The security group rules were checked and they were configured correctly with port 3000 open. The issue turned out to be that port 3000 was already in use by a process running in the background from a previous attempt.
The error that appeared in the terminal was the following.
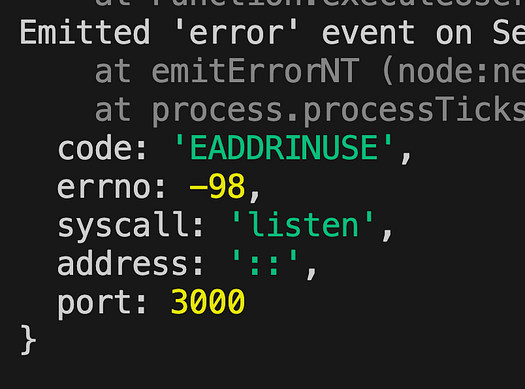
EADDRINUSE means the port is already in use. When Node.js tries to start the server and bind to port 3000, it finds that another process is already holding that port. Two processes cannot listen on the same port at the same time, so Node.js throws this error and exits.
To fix this, the process occupying port 3000 needed to be identified and killed. The following command finds the process ID of whatever is using port 3000 and forcefully terminates it.
sudo lsof -ti :3000 | xargs -r sudo kill -9
lsof lists open files and network connections on the system. The -ti flags tell it to return only the process ID of the process using port 3000. That process ID is then passed to kill -9 through xargs. The -9 signal is a force kill that cannot be ignored by the process.
After running that command, node server.js was run again.
The terminal confirmed the server was running.
The application was then accessible from the browser at http://<EC2-PUBLIC-IP>:3000.
XI. Conclusion
In this lab, we used npm pack to produce a portable archive the same way a build pipeline produces a build artifact. scp moved that artifact from the local machine to a remote server over SSH. apt was used to install Node.js on the server, which made the runtime available before the application could run. Opening port 3000 in the security group is what made the application reachable from the internet.